Video Sources
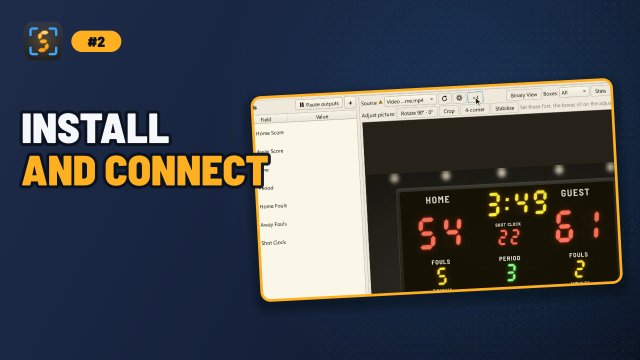
ScoreSight reads one video source per window. Choose it from the Source drop-down at the top of the viewer, or, while no source is open, with the buttons of the Open a source to begin card in the viewer (Camera, Video file…, Stream URL…, Screen…). To read two different sources at the same time, run two instances (see Multiple Instances & Profiles).
On this page
Supported sources
| Source | Windows | macOS | Linux | Notes |
|---|---|---|---|---|
| USB camera / capture card (UVC, HDMI/SDI capture) | ✔ | ✔ | ✔ | DirectShow on Windows, AVFoundation on macOS, /dev/video* on Linux |
| NDI® | ✔ | ✔ | ✔ | Sources on your network are discovered automatically |
| URL: RTSP / HTTP stream | ✔ | ✔ | ✔ | IP cameras, MediaMTX, encoders, HLS/HTTP streams that FFmpeg can open. RTSP tries TCP first |
| Screen Capture (window or whole screen) | ✔ | ✔ | ✘ | macOS needs the Screen Recording permission |
Video file (.mp4, .avi, .mov) |
✔ | ✔ | ✔ | Loops automatically; playback speed x1 to x32 |
ScoreSight remembers the last source and its type, and reopens it at the next start: a URL stream, a video file, a camera or NDI source (found again by its name), or screen capture. If the source isn’t available (for example a camera that is unplugged), ScoreSight starts without a source.
Cameras and NDI sources are discovered in the background, so the window appears right away and the Source list fills in a moment later.
What’s open, and whether it works
While a video file, a stream or a screen capture is open, the Source drop-down names it: Video file: final.mp4, Stream: rtsp://10.0.1.200:554/11 (never with the password) or Screen: OBS - Program. Its tooltip has the full path or address. To pick another file, stream or window, choose the same item again: Cancel keeps the open one. No source closes it.
The dot before the drop-down tells how the source is doing (its shape tells the same as its colour):
| Dot | Meaning |
|---|---|
| ● green | Frames are arriving |
| ▲ amber | The source is opening, delivers less than half of its own frame rate, sent no frame for a few seconds, or is reconnecting |
| ■ red | The source can’t be opened or read |
| ○ grey | No source is open |
The status bar repeats it, with the resolution and the frame rate.
When a source fails, a red banner under the source bar says what failed and what to try, with three buttons: Retry opens the same source again, Choose another source opens the Source list, and Troubleshooting opens the source troubleshooting guide. The view tools are disabled until frames arrive again.
Cameras and capture cards
Cameras and capture cards appear in the Source list by name. On Linux, each capture device is listed with its name and device node, for example HD Webcam (/dev/video0); device nodes that can’t capture video (such as metadata nodes) are not listed. If you plugged a camera in after starting ScoreSight, click Reload sources (the ⟳ button next to the drop-down, or F5).
Video settings (the gear button next to it, enabled only for cameras and capture cards) lets you request a specific format from the device:
| Setting | Use it to |
|---|---|
| FPS | Request a frame rate. |
| Resolution | Request a resolution. 1280x720 or 1920x1080 is plenty for most scoreboards. |
| Video Format (FOURCC) | Choose the pixel format, for example MJPG (compressed, allows higher frame rates over USB) or YUY2/YUYV (uncompressed). Only formats the device accepts are listed. |
| Capture Backend | Choose the capture API: Auto (the platform default: DirectShow on Windows) or a specific backend. Only the backends that ScoreSight’s OpenCV includes are listed: DShow on Windows, V4L on Linux and AVFoundation on macOS. |
Click OK to apply the settings you changed to the running camera. They are saved and applied again every time a camera source opens, in this order: capture backend, video format, resolution, frame rate. If the saved backend can’t open the camera, ScoreSight opens it with the default backend instead and logs a warning, so the camera keeps working and you can choose another backend. If you never chose a resolution, ScoreSight opens cameras at their highest supported resolution. The settings are shared by all cameras (they aren’t saved per device), and they don’t apply to NDI, URL, screen capture or file sources. The dialog also lists all the properties the device reports, which is handy for troubleshooting.
In ScoreSight 0.1.x, saved Video Settings were not applied when a camera opened, and pressing OK could reopen the camera and lose them (#20). This is fixed in 0.2.0.
Most USB cameras can be used by only one application at a time. Close OBS, Zoom, Teams or any other app that is using the camera, or share the feed through NDI or OBS’s Virtual Camera instead.
On macOS, ScoreSight needs the Camera permission. On Linux, your user needs access to /dev/video* (usually via the video group). See Installation.
NDI
NDI sources on your local network are listed automatically. The first discovery after ScoreSight starts waits up to about 2 seconds for sources to answer, in the background. Click Reload sources (⟳ or F5) if a source started after ScoreSight: later reloads are instant and list every source found so far. ScoreSight receives the highest-bandwidth stream and signals a program (on-air) tally to the sender.
If NDI sources don’t appear:
- Make sure the sender and ScoreSight are on the same network and subnet, and that the firewall allows NDI (mDNS on UDP 5353 plus the NDI ports).
- On macOS, allow the Local Network permission for ScoreSight.
- Test the source in NDI Studio Monitor or OBS first.
URL sources (RTSP and HTTP)
Choose Stream URL (RTSP, HTTP)… and enter the stream address, for example:
rtsp://user:password@192.168.1.50:554/stream1
rtsp://10.0.1.200:554/11
http://192.168.1.60:8080/video
URL sources are opened with OpenCV’s FFmpeg backend on every platform, so anything FFmpeg can play (RTSP, RTMP pulled over HTTP, HLS, MJPEG over HTTP) usually works. Spaces around the URL are ignored.
Opening a stream and reading each frame give up after 5 seconds (FFmpeg’s own default is about 30 seconds), so an unreachable or stalled stream can’t block ScoreSight for long, and closing or switching away from it doesn’t hang.
RTSP over TCP
ScoreSight tries to receive RTSP streams over TCP first, and falls back to UDP when the camera refuses TCP. TCP gets through firewalls, NAT, VPNs and Wi-Fi, where UDP often fails with “Unable to play video stream”, a grey or frozen picture, or heavy corruption.
ScoreSight does this by setting the environment variable OPENCV_FFMPEG_CAPTURE_OPTIONS to rtsp_flags;prefer_tcp for itself, unless the variable is already set. If you set it yourself, your value is used as is.
If a camera only supports RTSP over UDP and its stream still won’t open, force UDP: set the variable to rtsp_transport;udp before you start ScoreSight:
Windows (PowerShell, for this session):
$env:OPENCV_FFMPEG_CAPTURE_OPTIONS = "rtsp_transport;udp"
& "C:\Program Files\ScoreSight\scoresight.exe"
Windows (permanently, for your user): run setx OPENCV_FFMPEG_CAPTURE_OPTIONS "rtsp_transport;udp" once, then start ScoreSight from the Start menu as usual.
macOS / Linux:
OPENCV_FFMPEG_CAPTURE_OPTIONS="rtsp_transport;udp" /path/to/scoresight
The variable takes any FFmpeg options, as key;value pairs separated by |.
Checklist for streams that won’t open
- Test the exact URL in VLC (Media > Open Network Stream) or with
ffprobe -rtsp_transport tcp "rtsp://...". If it doesn’t play there, the URL, credentials or network are the problem. - Include the port and path, and URL-encode special characters in the password (for example
@becomes%40). - If the camera plays in VLC only over UDP, try RTSP over UDP (above).
- Many cameras offer a lower-resolution “sub stream” (often
/stream2or/102). A 720p sub stream is enough for most scoreboards and is easier on the network and CPU. - As a fallback, open the stream in OBS and send it to ScoreSight with NDI or OBS’s Virtual Camera.
See also Troubleshooting: RTSP stream won’t open.
Screen capture
Choose Screen capture… and pick a window from the list, or Capture the entire screen. This lets you read a score from a game, a web page, a scoreboard-controller app or a TV graphics preview.
- Windows: captures the selected window or the whole screen.
- macOS: requires the Screen Recording permission (System Settings > Privacy & Security > Screen & System Audio Recording). Without it macOS shows ScoreSight only the desktop: the source banner says so, and its Open System Settings button opens that page. After granting it, quit and restart ScoreSight.
- Linux: not supported. Use OBS (with its screen capture) plus NDI or the virtual camera.
Keep the captured window at a fixed size and position. Boxes are positioned in pixels, so resizing the window moves the content out from under them.
Video files
Choose Video file… to load an .mp4, .avi or .mov file. The file loops when it reaches the end, which makes it ideal for tuning your boxes on a recording before the game.
The speed button next to the source (×1, ×2, ×4, ×8, ×16, ×32; shown for video files only) skips frames to fast-forward through long recordings. Speed does not change how often boxes are read (that is Detections / s). A newly opened file plays at ×1.
Switching and reloading sources
- Selecting a different source closes the current one and opens the new one. Your boxes and their settings stay as they are. If the old source is stalled, ScoreSight waits at most 3 seconds for it and lets it finish in the background.
- Reload sources (⟳, F5) re-scans cameras and NDI sources.
- Rotation, crop and 4-corner correction are global settings, not per-source settings. If you switch to a source with a different framing, adjust them again.