Viewer & Image Tools
The large viewer shows the source picture with your boxes on top. Above it are two rows:
- The source bar: the source and, on the right, the view tools: Binary View, Boxes: (the box display style), Stats, Fit and the zoom level. They change only what you see.
- Adjust picture: Rotate, Crop, 4-corner and Stabilize. They change the picture every box is read from, so set them before you place your boxes.
In a narrow window the view tools show icons only; their tooltips name them.
On this page
Processing order
Every frame goes through the same steps, in this order:
- Rotate (0°, 90°, 180°, 270°)
- Crop (left / top / right / bottom pixels)
- Stabilize (if enabled)
- 4-corner correction (perspective warp, if set)
- Convert to grayscale, plus one black-and-white version of the whole picture if a box uses Global binarization.
- Read every box with its own per-box settings, each on its own copy of the picture.
Boxes are positioned on the result of steps 1–4. Change rotation, crop or 4-corner correction first, then place your boxes. A crop change moves the boxes with it, so they stay over the same digits; after a rotation or a new 4-corner correction, check that the boxes still sit on the right digits.
Navigating the viewer
| Action | How |
|---|---|
| Zoom in / out | Ctrl + mouse wheel (⌘ Cmd + mouse wheel on macOS) in 5% steps, or Ctrl+= and Ctrl+- in 25% steps, up to 400%. The zoom level (for example 59%) is shown after Fit |
| Scroll | Mouse wheel (vertical). Use the scroll bars when zoomed in |
| Pan | Drag with the middle mouse button |
| Fit the picture to the window | Fit (it was 1:1), or Ctrl+0 |
| Place the selected field’s box | With a field that isn’t on the picture selected, the pointer is a crosshair: drag over its numbers. Or double-click the picture to put the box there. Esc cancels a drag |
| Select a box | Click it (the field list selects it too) |
| Move a box | Drag it, or press the arrow keys: 1 pixel per press, 10 with Shift (click the picture first, so the viewer has the keyboard) |
| Resize a box | Drag an edge or a corner handle. White square handles appear on the selected box |
| Draw the selected box again | Alt + drag (⌥ Option + drag on macOS) on the picture |
| The box’s actions | Right-click it: Remove from picture (or Del), Rename…, Hold value…, Zoom to box |
| Deselect | Click empty space in the picture, or press Esc |
See Keyboard & Mouse for the full reference.
Binary View
Binary View (Ctrl+B) switches the preview between the camera picture and the black-and-white image the OCR engine reads. Inside each box you see the result of that box’s own settings (binarization method, cleanup, vertical scale, skew and dilation), exactly as the OCR receives it.
This is the most useful tuning tool: the OCR can only read what you see here. Digits should be solid and clearly separated from the background, with no stray specks touching them. See Recognition Tuning.
A view tool that is on, such as Binary View or Stats, is filled with the highlight colour.
4-corner correction
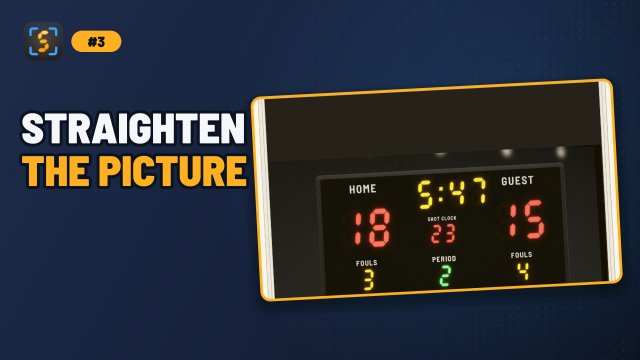
When the camera looks at the scoreboard at an angle, the digits are skewed and get smaller towards the far side. 4-corner correction warps the picture so the scoreboard becomes a straight rectangle.
- Click 4-corner. A blue banner over the picture says Click the 4 corners of the scoreboard: 0 of 4. The picture is shown without any previous correction, and the boxes are hidden while you click.
- Click the four corners of the scoreboard (or of the area you want straightened). The order doesn’t matter: ScoreSight sorts them clockwise from the top-left. Red markers and a red outline show your clicks, and the banner counts them.
- After the fourth click the warp is applied and saved, and 4-corner stays highlighted.
Esc or the banner’s Cancel stops picking corners. A previous correction is kept: it is replaced only by the fourth valid click, and until then the boxes are still read from the corrected picture.
With a correction in place, 4-corner never removes it at once. It opens a menu:
- Redo corners…: pick four new corners as above (Esc keeps the current correction).
- Remove correction…: asks first, because your boxes were placed on the corrected picture and may have to be moved.
- Cancel.
If the four points can’t be used (for example the same corner clicked twice, points almost in a line, a crossed shape, or a very small area), ScoreSight shows “Invalid four-corner selection” at the bottom of the picture, the banner goes back to 0 of 4 and you can click four new corners. The previous correction stays. An unusable correction saved by an older version is discarded at startup.
Pick corners that form a real rectangle in the world, such as the outer frame of the scoreboard.
Crop
Crop opens the crop panel with Drag to crop and the Left, Top, Right and Bottom values in pixels. Cropping removes the parts of the picture you don’t need. That reduces CPU use, makes the picture larger in the viewer and, with Global binarization, improves the black-and-white threshold because the dark surroundings are gone. Click Crop again to turn cropping off; the values are kept for the next time. Reset crop… removes the crop: after you confirm, the four values go back to 0, cropping turns off and the whole picture is read again, with the boxes still over the same digits (see below).
To crop with the mouse:
- Click Drag to crop. The viewer shows the whole picture (rotated, but without the crop, so that you can also make the crop wider), the boxes are hidden, and a blue banner says Drag around the part of the picture to keep.
- Drag around the scoreboard. The part outside the rectangle is darkened while you drag.
- When you let go, the crop’s four values are set, cropping is on and the cropped picture is fitted to the viewer.
Esc (or the banner’s Cancel, or Drag to crop again) stops and keeps the current crop. A drag of a few pixels is ignored. The values can be fine-tuned afterwards. Drag to crop and 4-corner picking exclude each other, and the crop panel is hidden in the Live layout.
The boxes move with the crop. The boxes are placed on the cropped picture, so a new left or top edge would leave them over other pixels: whenever the crop’s top-left corner moves (with Drag to crop, the Left and Top values, Reset crop…, or turning Crop on or off), every box, and the corners of a 4-corner correction, move by the same amount, and stay over the same digits. (In ScoreSight 0.2.0 and earlier they stayed where they were.) A box that ends up entirely outside the cropped picture keeps its place, so a wider crop brings it back, but it reads nothing meanwhile: a line under the crop panel names those fields.
Rotate
Rotate turns the picture 90° clockwise each time you click it (0° → 90° → 180° → 270° → 0°), and shows the current angle, for example Rotate 90° · 180°. Use it for cameras mounted sideways or upside down.
Stabilize
Stabilize compensates for small camera movements, such as a tripod bumped during the game or a camera that slowly drifts. When you enable it, ScoreSight averages the next few processed frames into a reference image, and passes the frames through unchanged meanwhile. After that, it aligns every new frame to the reference.
- Enable it after the camera is in its final position.
- To take a new reference (for example after re-aiming the camera), turn Stabilize off and on again. A change of the picture size also starts over.
- Frames that can’t be aligned (black or featureless frames, or too few matching details) are passed through unchanged instead of being distorted.
- Leave it off for fixed, rigid mounts and for screen capture, because it costs CPU.
Box display style
Boxes: controls how boxes are drawn:
| Style | Shows |
|---|---|
| No Box | Nothing, except the box you have selected |
| Outline | Box outlines only |
| Names | Outlines and a label for each box: its state, name and reading |
| All (default) | Everything in Names, plus a thin green rectangle around the area that was actually read (with Auto Crop) and thin blue rectangles around each character the OCR found |
Boxes are drawn with a light blue line and a dark edge, so they stay visible on red or yellow LED digits. The selected box is drawn in the highlight colour, with white square handles.
Each box’s label sits below the box, so it covers neither the digits nor the scoreboard’s captions (HOME, GUEST and PERIOD are usually above the digits). It moves above the box when there’s no room below (another box, another label or the edge of the picture), and inside the box only when there’s no room at all. Labels keep the same size at every zoom. The symbol at the start of a label tells the state of the latest reading:
| Symbol | State | Meaning |
|---|---|---|
| ✓ (green) | Success |
A new value |
| = (grey) | SameNoChange |
The same value as before |
| ! (amber) | FailedFilter |
Read, but rejected by a filter (the label shows the rejected text in quotes, for example ‘2l’, and has an amber border) |
| ∅ (red) | Empty |
Nothing was read (0.2.0 showed a red EMP) |
Statistics overlay
Stats (or View > Statistics overlay) shows the statistics at the viewer’s top-left corner, at the same size at every zoom. It is off by default for new installations, because the status bar shows the same numbers; if you used it before, it stays on until you turn it off. The choice is remembered.
| Statistic | Meaning |
|---|---|
| Frames/s | How many frames per second ScoreSight reads from the source (capped at about 33). |
| Updates/s | How many times per second the boxes are read. Follows the Detections / s slider (1–15, default 5). |
| Previews/s | How often the preview picture is refreshed. This is about 1 per second on purpose, at any Detections / s setting, to leave the CPU for OCR. It does not affect how fast values are read or sent. |
| Resolution | The resolution delivered by the source. |
See Performance Tuning for how to interpret and improve these numbers.